Cooking Technique #2: Roasting

Alright, on to cooking technique #2 - Roasting. Roasts are a classic dish for celebrations, holidays and family get togethers. Everyone has their secret method, but from my research this is the most delicious, and easy method I could find. A few things to note.
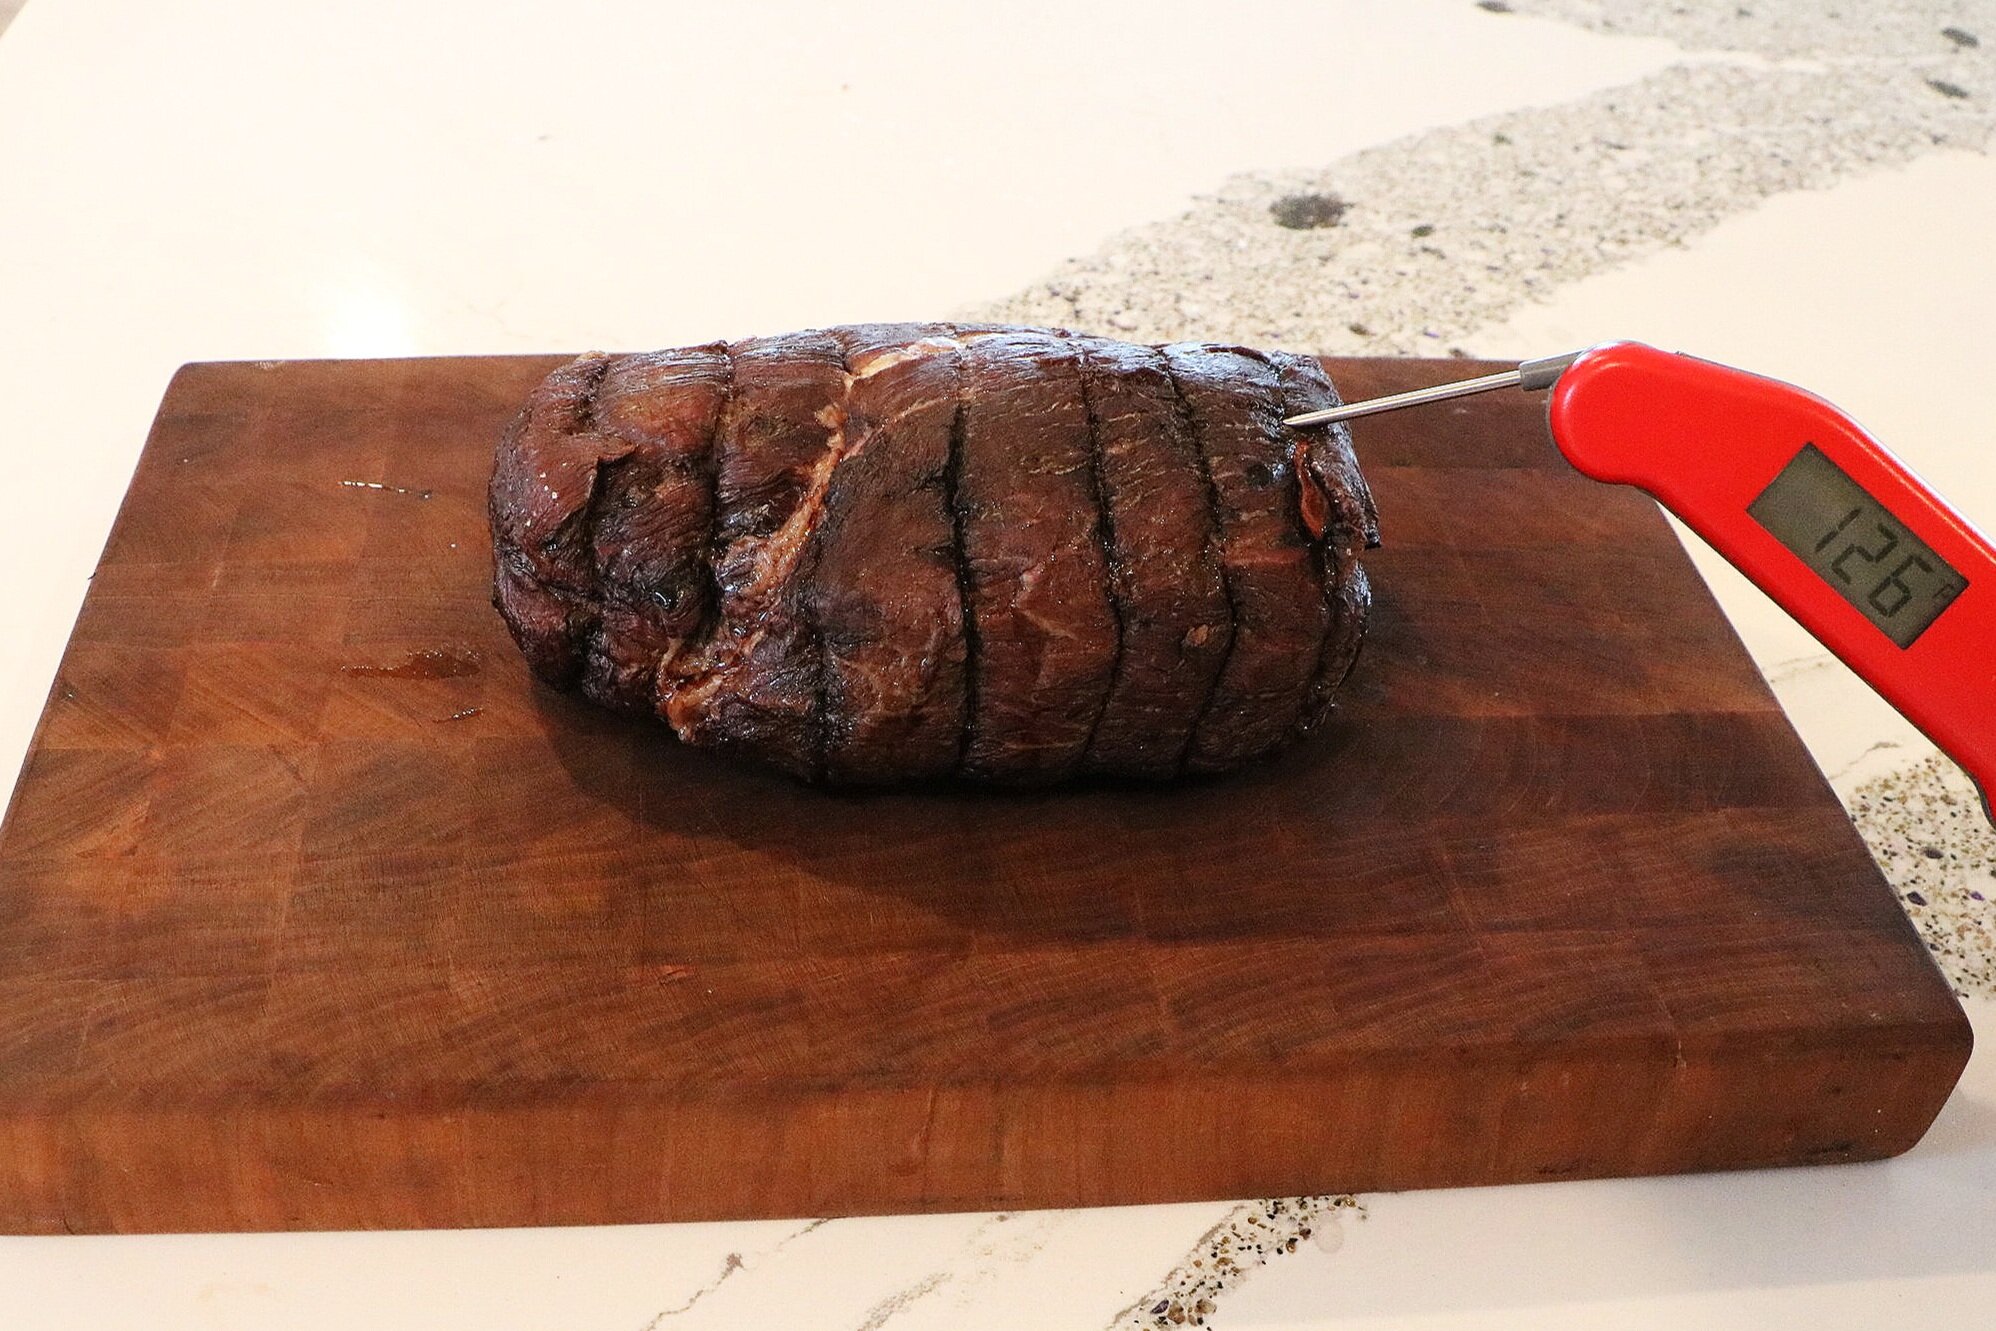
An internal thermometer is important. To be honest, it is important for any roasting technique so I highly suggest just getting one if you don’t have one in your kitchen. You won’t regret it! My recommendation is the thermapen, but there are lots of options out there.
The method below keeps all of the juices where they belong, in the roast, so there will not be drippings for gravy. This is a good problem to have! I suggest using a homemade or quality store brand beef stock to make your gravy.
With this in mind, let’s get started!
Goal of the Technique: Roasting is a dry cooking method using indirect or convection heat. The goal of roasting is to cook the beef evenly to the preferred doneness (rare, medium-rare, medium, medium-wel or well-done) and create a tasty golden brown crust on the outside.
Cooking Method: Roasting
Cuts to use:
Prime Rib Roast
Chuck Roast (ie. mock tender, blade, shoulder clod)
Round Roast (ie. eye of round, bottom round, top round)
Tenderloin Roast
Strip Roast
Sirloin Roast
Tri-Tip Roast
What you will need:
Wire Rack
Roasting Pan
Oven
Salt (preferably Kosher Salt)
Cut of beef
Internal Thermometer
Cooking Technique:
1. Salt the thawed cut liberally. This can be done up to 3 days prior. Once salted, place in the fridge uncovered on a wire rack. The fridge will dry the surface, making for a tastier golden brown crust.

2. Pre-heat oven to 225F.
3. Set the roast on a wire rack with a roasting tray underneath and place into the oven. Cooking time will differ depending on the size of the roast and preferred doneness, but expect 2 - 4 hours. I suggest checking the internal temperature of the roast after an hour and a half with a thermometer.

4. Remove the roast from the oven when the internal temperature is your preferred doneness. Here is a simple guide:
Rare: 125f (my personal favourite)
Medium Rare: 130f (my suggestion for most cuts and palettes)
Medium: 135f
Medium Well: 140f
Well Done: 145f+
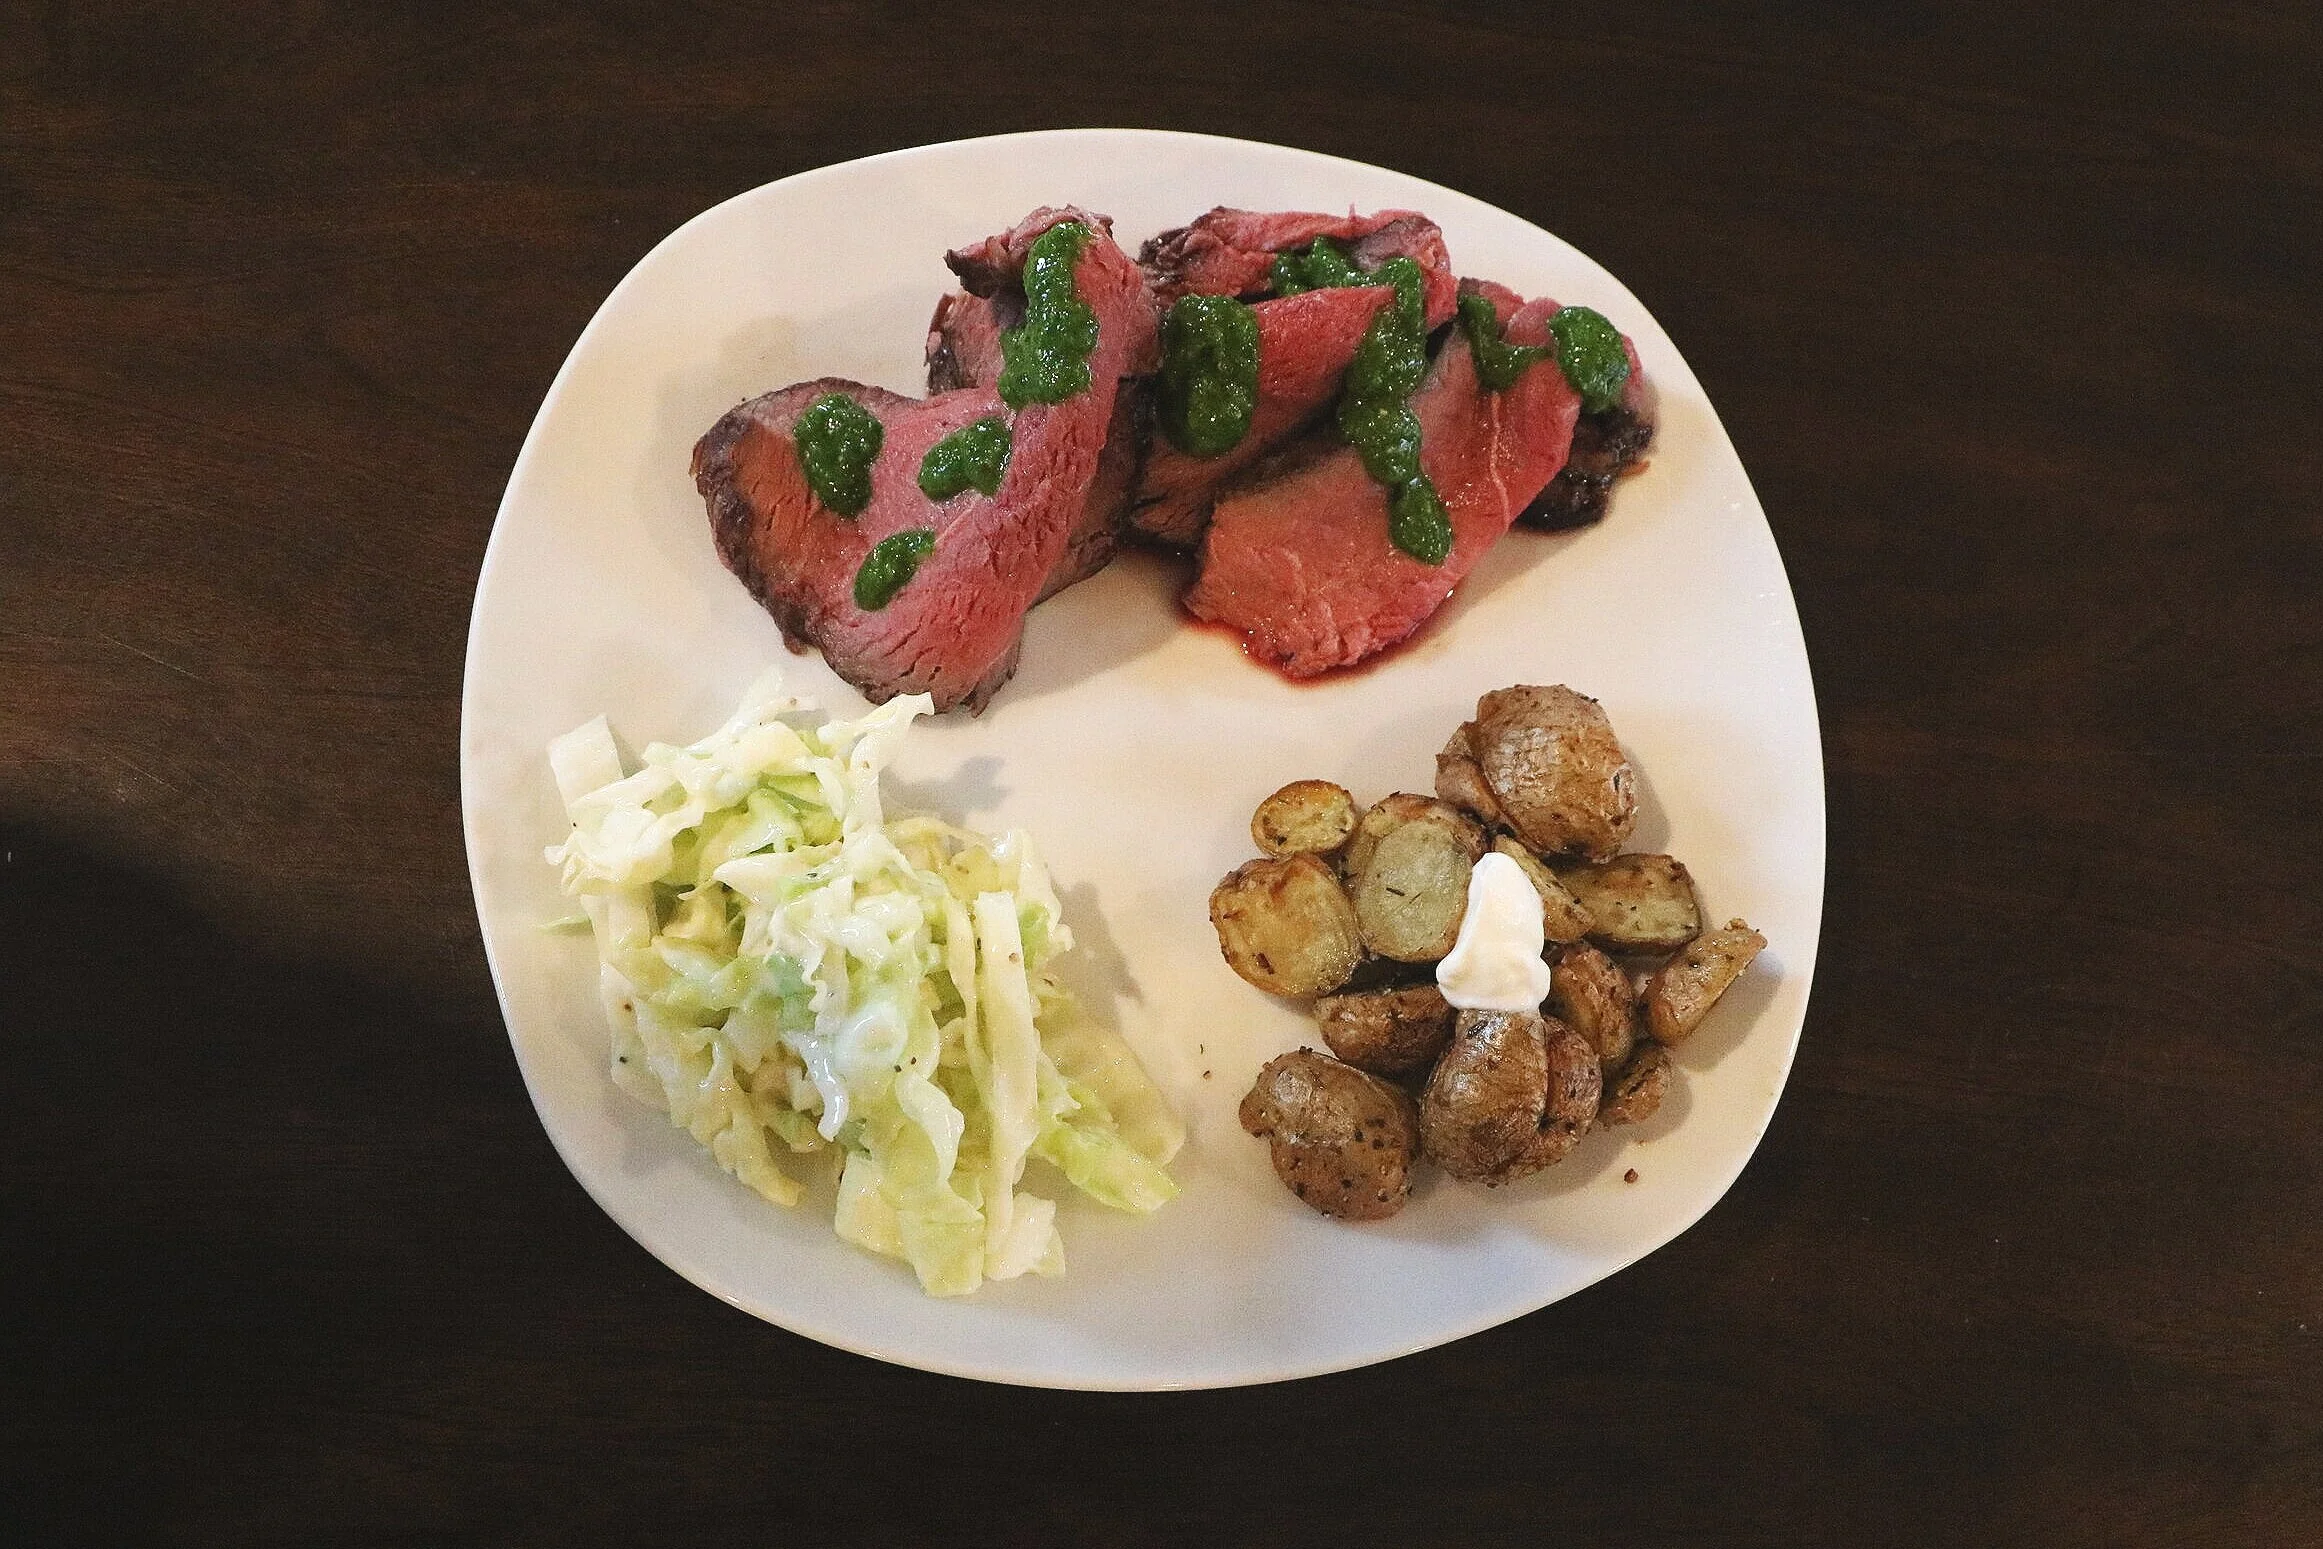
5. Once the roast is removed from the oven, leave on the counter to rest from 30 - 90 minutes. This is a perfect time to prepare all of the other dishes you will enjoy with your roast. You will notice that the outside of the roast isn’t ready yet, but this will be dealt with in the next step.
6. Approximately 20 minutes before you are ready to eat, pre-heat the oven to 550f (or as close as possible). Once the oven is hot, place the roast back in for 8 - 10 minutes or until there is a golden brown crust. Ensure your oven is hot so you only cook the outside of the roast.
7. With the crust now cooked, your roast is ready to serve!
So that is the basics of cooking a roast well. I really like this method which comes from J. Kenji López-Alt. He is the Chief Culinary Advisor at Serious Eats and the author of The Food Labs: Better Home Cooking Through Science. I highly suggest checking out both.
If you are looking for a sauce to complement your roast, you can try making your favourite gravy using high quality stock rather than roast drippings (which will still be in the roast!) or try a Chimichurri Sauce (as seen above), Bearnaise Sauce, Red Wine Jus or Peppercorn Sauce.
This roasting method featured a technique called “reverse searing”. Rather than cooking the meat starting with high heat (searing) and reducing the temperature, it is reversed and the searing happens at the very end. I will go further into the benefits of this technique in our next post: Cooking Technique #3 - Grilling & Reverse Searing.
Happy Grazin’,
James Wilton | Founder of Greenock Beef